I wanted to share a pattern to celebrate one year of blogging!
There’s probably some newfangled, made-up term like “blogiversary” which I’m supposed to use, but I’m already too old for stuff like that.
Recently, I have been trying to fight off a stubborn cold and I have been taking every opportunity to rest. Rather than taking on writing up a new pattern, I dusted off this already started patchwork blanket tutorial, added all the photos, and finished it just in time.
I feel like this has become my signature baby blanket.
Patchwork Baby Blanket Tutorial
I didn’t invent any of these techniques, I just put them together.
The squares are just 3 or 4 round solid dc granny squares. The joining method I have seen referred to as “pull loop through.” It makes a flatter seam than the usual join as you go method, and leaves a lovely twisted border between the colors.
I like to use a self-striping yarn with medium or long, gradual color changes. That way you only have to use one colorway of yarn and automatically get a finished blanket with nicely coordinated colors. It also makes the final result a bit of a surprise. I’m never sure how a yarn is going to look in the patchwork pattern until I actually get started. I usually use a heavier worsted or bulky weight, or two strands of light yarn, and a K hook. I’ll list some suggestions at the end.
For this tutorial, I decided to use solid colors so the joining stitches would be easy to see.
I am using Loops and Threads Charisma Yarn (Michael’s store brand) in “Taupe,” “Charcoal,” “Electric Blue,” and “Fuchsia” and Deborah Norville Serenity Chunky Yarn in “Highland Heather,” and “Fudge.” The yarns feel identical. They are chunkier than the yarn I usually use for baby blankets and will make an afghan weight blanket. I’m not totally sure about these color, but I’m going to jump in anyway.

I started with taupe and made a 3-round square as follows:
- Starting in a magic loop, ch 4 (counts as dc, ch1), (dc 3, ch 1) three times, dc 2, join with a ss to the 3rd ch of the starting ch 4, ss into the corner ch1 space
- Ch 4 (counts as dc, ch1), work 2 dc into the same ch 1 space, [dc in each of the 3 dc along the side. In the corner ch 1 space work (2 dc, ch 1, 2 dc)] three times. Dc into each dc along the last side. Dc into the bottom of the starting ch 4, ss into the 3rd ch of the starting ch4, and ss into the corner ch1 space.
- Work as round 2, but note there are now 7 dc along each side

If you choose to do more rounds, the number of dc along between the corners increases by 4 each round. I find 3-4 rounds works best because doing a ch 1 at the corners, instead of the standard ch 2, makes the squares slightly rounded. I like the ch 1 because it also decreases the size of the holes along the diagonals. You could use any granny square you want with this joining method.
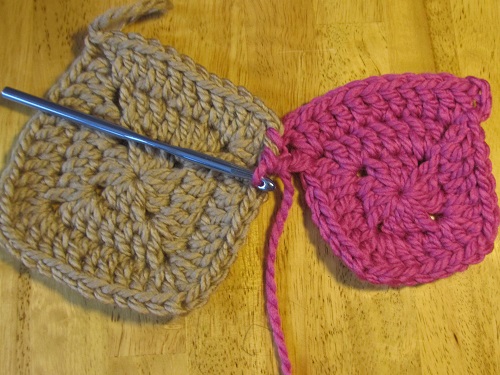
After finishing the taupe square, I made a fuchsia one through the 2nd round. When you join as you go, you attach the squares while crocheting the final round.
I worked the 3rd round as usual along the first side of the square. At the corner I worked 2dc into the corner space and then stopped. The squares will be joined along one side, starting with the corner. 
The pull loop through method is worked as follows:
- Remove the loop from the hook

- Insert the hook down through the corner space of the taupe square
- Pick up the dropped loop

- Pull the loop up through the taupe square. There is one fuchsia loop on the hook.

- Ch1 for the corner. Corner attached.

- PLT (pull loop through, meaning work steps 1-4) the 1st dc after the corner on the taupe square. Do not ch 1.


- Work a regular dc into the corner space of the fuchsia square
- PLT the next dc on the taupe square


- Work another dc into the corner of the fuchsia square, completing the corner (you should have 2 dc, ch 1, 2 dc worked into the corner space of the fuchsia square, with the ch 1 and 3rd and 4th dc also attached to the taupe square)
- Continue PLT each st along the side of the taupe square, and working the corresponding dcs on the fuchsia square, until you reach the next corner. The last two dcs will be worked into the corner space of the fuchsia square.

- PLT the corner space of the taupe square

- Ch1 for the corner, and then work the remaining two sides of the fuchsia square as usual (not joining.)

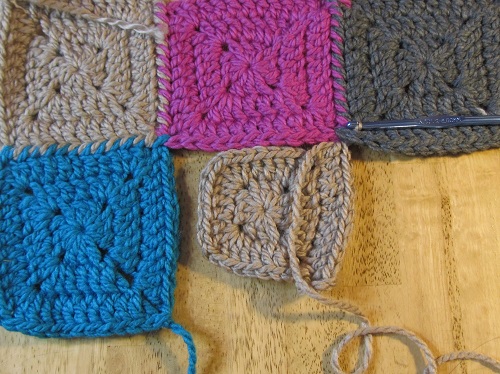
Keep making and joining squares until you are ready to start on the second row of the blanket. 
When attaching the second row, I like to join the corners to the square diagonal, if it is available. Here, that means the first corner of the blue square is joined to the fuchsia square, ch 1 for the corner, then I skip the ch 1 corner space of the taupe square and do the first PLT in the first dc, after the corner, on the blue square. The rest of the join is the same as in the first row.


The second square in this row needs to be joined along two sides. Work one side as usual, and then join to the diagonal corner, here the grey square. Skip the first corner space of the fuchsia square and PLT the first dc of the fuchsia square.
PLT join until you get to the corner. Skip the 2nd corner of the fuchsia square, and work your corner PLT, ch 1 into the corner of the diagonal taupe square.

Skip the corner space of the blue square and PLT the first dc of the blue square. Continue PLT join until the 3rd side of the taupe square is completely joined to the blue square.

PLT the corner of the blue square, ch 1, and then complete the final side of the taupe square.

Keep joining squares until your blanket is completed.
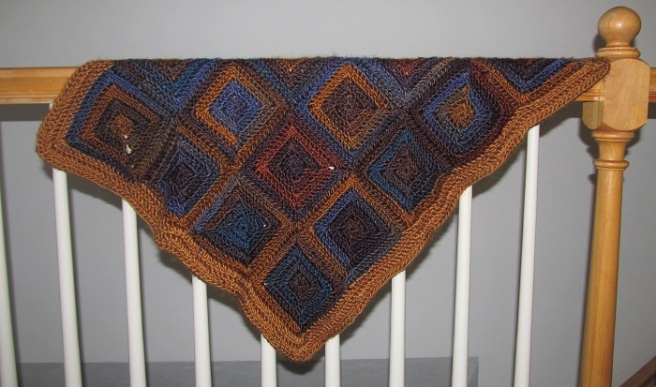
Mine has two rows so far, but I will update with a picture when I finish it. I really love the twisted colors and flat seams this joining method makes!

For my self-striping patchwork blankets I usually do a simple 2-round dc border in a complementary solid color. These blankets don’t need a fancy border.
Yarn Suggestions
Here are some yarns I like to use. I should probably mention that I have never been compensated in any way for using or blogging about a yarn. It would be nice if I were.
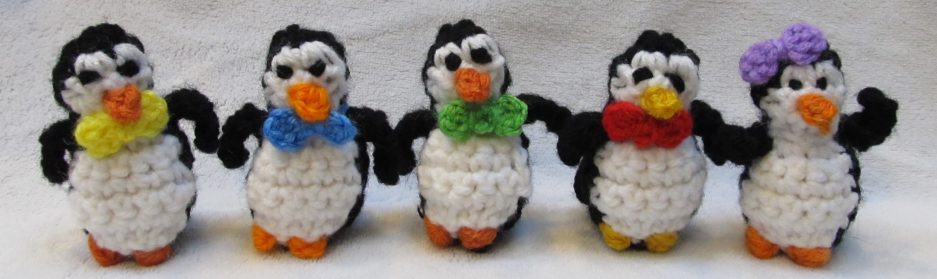
Lion Brand Landscapes: the photo at top was made with “Mountain Range” for the body and “Ochre” for the border. Here is “Boardwalk” with “Amethyst” for the border. My 3-year-old son chose the rainbow yarn and I had to use it for something. It’s a bit bright to give away as a baby gift, but would make a nice doll blanket.

Red Heart Boutique Unforgettable (worked with 2 strands held together): One blanket in “Tidal,” (border is dc with 2 strands of Caron Simply Soft and a K hook.) Second blanket is in “Winery” (border is Lion Brand Landscapes in “Bordeaux” with a K hook.) Both have 4-round squares.


Red Heart Boutique Treasure: 70% acrylic 30% wool, but still soft. Unfortunately, they just discontinued this yarn. Here is a blanket in “Horizon,” (border is Landscapes in “Ochre”) and two unfinished ones in “Abstract,” and “Watercolors.” All have 4-round squares.
")
")

Lion Brand Tweed Stripes: in “Limeade” (discontinued color) with 3-round squares and another in “Woodlands” (border is Landscapes in “Rust”) with 4-rounds squares. This is about the heaviest I would want to go for a baby blanket.

")
Lion Brand Scarfie: Unfinished in “Oxford/Claret.” I wish it came in skeins with more than two colors, but the texture and weight is lovely. They have a new mint/silver I would love to try. 
Less widely available is Elegant Yarns Kaleidoscope. This is a roving wool yarn. It is rougher than the others (it feels like wool!) but the colors are beautiful. I started a hexagon afghan in it last year. At this point, is has about doubled in size from this picture, but has been set aside for the past few months. I’m hoping to get back to work on it soon. 4-round hexagons.

I am also planning to try the new Premier Puzzle Yarn. I love the colorways. I’ll update with a photo when I get around to it. I’m always on the look out for new yarns to try!

What a lovely take on a granny square blanket! I love the join as you go method. So much easier than looking at a giant stack of squares and thinking omg now I have to sew all of these together! I like the traditional holey granny but sometimes I just don’t want any holes!! Thanks for sharing this pattern! 😀
LikeLike