Hexagon Baby Sweater

IMG_8310 small.jpg

This post could also be titled “How Quickly I Forget.”

I know I recently ranted about how much I hate crocheting or knitting clothing, but I just found a gauge-less sweater pattern!   It’s generally called a hexagon baby sweater.  The pattern is all over the internet (as usual,) but none of the sites I found had an explanation of the pattern.  I hate blindly following a pattern.  I feel like I can’t really trust it unless I see how it goes together.  And it bothers me when I can’t modify it before starting.   There’s a link to a pattern at the bottom if you prefer following a pattern to using a “recipe.”

Here’s what I figured out:  basically, you crochet two six-sided granny squares.  Not hexagons, six-sided squares (I know, I know… just bear with me.)  A 2-dimensional hexagon has six 120-degree angles.  The shape you want to make will have six 90-degree angles.  It sounds weird, but it’s easy to make.  It just looks really ruffled.

Here’s how it looks with the middles of the edges folded up so it’s all nicely organized.  My corners aren’t exactly 90-degrees, but they are pretty close.

IMG_8277 angles small.jpg

Choose a pattern for a square (classic granny, solid dc/hdc/sc square,  lacey square, whatever) and find the repeating part of the pattern for each round.  Instead of doing that repeat four times, do it six times.  You’ll get a nice shape with six 90-degree angles.  And then you make it as big as you need for the sweater you want.

When the shape is done, you fold it in half and it makes half of a sweater.  You make a second, identical shape.  Then you sew them together along the back and tops of the sleeves and you’re done.  Or you can add some trim and maybe a hood.

Unfortunately, given the proportions of the sweater, I think this method would only work for a baby or young toddler.  It has fat sleeves.  I suppose you could try starting the sweater with this pattern and then adding rows or rounds to specific areas, like the ends of the sleeves and bottom of the sweater, to get the correct shape.  That does kind of defeat the “no gauge” simplicity, though.  Not totally, just kind of.  I’ll probably try it eventually.

I used Premier Parfait yarn in “cream” with an I hook (5.25mm).  It was hanging out in my stash.  The yarn is bulky, but it has a very soft drape, so it works up quickly but doesn’t feel stiff.  And it’s very, very soft.  Perfect.

I decided to work with a mostly solid square with dc along the edges and (2dc, ch1, 2dc) at the corners.  If I make another I think I’ll use a (2dc, tc, 2dc) corner pattern to eliminate the holes.  A classic granny looks nice, too, if you use small yarn.

small

I was aiming for a 6-months size.  I want to add cuffs, so I aimed for a little smaller than my sizing hoodie.  6 rounds seemed about right.  Here is my sizing hoodie with a 6 round shape on the left.  On the right is a six round shape to which I added a row along the bottom and up the back.  I will be adding edging for buttons on the front so I need an extra row on either half of the back to even things up.  (If you fold your shape and it doesn’t look like half a sweater, you folded it at the corners instead of in the centers of the sides.)


IMG_8299 small

I added a row to the bottom and back of the left side piece, sewed them together up the back, added cuffs, and added 3 rows of sc along the front edges.  One side has a few ch1 button holes evenly spaced.  Unfortunately, I have no appropriate buttons right now and won’t be out at a store for another 5 days or so.  You could also just sew together the front and back and have a pull-over sweater.  The little bit of yarn off to the side is what I had leftover from my first skein, so you could definitely make up to a 6 month size from one skein of Parfait yarn.  I didn’t sew the tops of the sleeve yet because I wanted to add a hood.

For the cuffs I stitched around the ends in a hdc, hdc, skip a st pattern.  That decreased the sleeve from 24 to 16 sts.  Then I did two rounds of alternating front-post and back-post hdc making sure I did front-posts in the front-posts and back-posts in the back-posts on the second round.


IMG_8304 small

For the hood I made four 3-round squares in the same style as the rest of the sweater.  I realized afterwards that I could have just made one large 6-round square.  Oops.  It’s cute, even if I made more work for myself.  It’s also a bit tall.  Again, it’s cute.  If I make another sweater I think I would do two 3-round squares, sew them together to make a horizontal rectangle, and then add a row (or two) of dc to the top and bottom.

I edged the front with 3 rounds of sc just like the front of the sweater.  In retrospect, I should have sewn the pieces together (sides and hood to body) before adding edging.  Next time I’ll do it that way so everything is even.

I’m pretty sure I used less than 1 1/2 skeins for this sweater (size 6 months.)  It took a few hours to make, but not as long as any other sweater project I have done.  There wasn’t a lot of backtracking and fixing.

Summary:

  1. make 2 six-sided granny squares.
  2. Fold them in half and sew them together.
  3. For an oversize hood make a four-sided granny square in the same style with the same number of rounds.  For a more regular size one you’ll need a rectangle.
  4. Add edging/trim/cuffs.
  5. Admire.

Things I loved about this sweater method:

  1. No gauge.  I seriously can’t say it enough.
  2. Easy.  Really piece-of-cake easy.  If you can crochet a basic square, you can crochet this sweater.  (I might even have to have my sister test that for me.)  And since you don’t need to carry a pattern around, you can work on it anywhere: at the playground, in the backyard, in the car (while a passenger, not while driving,) while watching TV or a movie, and so on.
  3. Fast!  If I’m going to spend time making something my baby (or any baby) is going to outgrow really quickly, I don’t want to spend a lot of time on it.  With the Parfait yarn this worked up in only a couple hours.
  4. Cute.  I think it turned out really, seriously, cute.  And it’s so soft.

The hardest part of making the sweater was that Miss C was asleep when I finished and I had to wait several hours to try it on her.

Here is a link to a pattern if you would rather work it that way.  I read the post to get a feel for how the sweater was made, then did my own thing.

http://www.bevscountrycottage.com/hexagon-jacket.html


Newborn Clothes

Miss C is quickly outgrowing her 3-6 month clothes.

While going through her room, I recently found a laundry basket full of her newborn clothes (yes, the house gets that messy.)  I don’t know about you, but I have trouble parting with any baby clothes, but the newborn ones are the hardest.  I can’t believe she was ever that small.  I really can’t believe the boys were ever that small.  I want to keep the whole basket of clothes, but how do I justify keeping clutter?

Believe it or not, this doesn’t involve a craft.

Really.

It doesn’t.

We have a few baby dolls from when I was preparing the boys for various younger siblings.  I was smart and got 18-20″ dolls.  So I’m just going to hang on to all the newborn clothes, and my favorite 0-3 months clothes, and label the box “doll clothes.”  When Miss C hits her doll phase (if she ever does) I’ll give her the dolls and the box of her old baby clothes and she can dress her dolls in them.  It will be adorable, I’ll love seeing the clothes again, and she will probably prefer “real” clothes to cheapo doll clothes.  It’s a win all around.  And in the meantime, the boys can put the clothes on their dolls.

Here is Miss C, at 4 months old, cuddling Little A’s dolls (Rose and Violet) who are wearing her old clothes.

IMG_8244 b

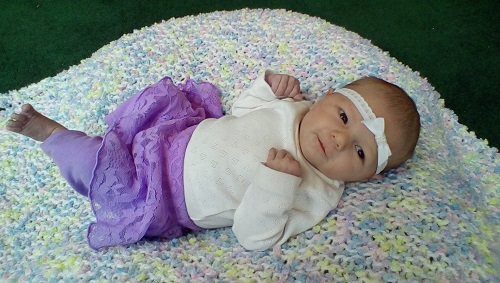
Here is a picture of Miss C at 2 days old wearing the sleeper, and at 2 weeks wearing the skirt.  I can’t believe how quickly she is growing.

IMG_4684 (2)Carolyn

I have a bunch of newborn boy clothes leftover from the boys, too.  But Little A’s dolls are both girls right now.


Octagon Blankie Progress Update

IMG_8173 small.jpg

All the shapes are done, all the sewing is done.  I just have to do a border, crocheting over all the loose ends.  I’m going to do a row or two of navy dc and then maybe a row of silver shells around the edges.  I’ll have to think about that one more.

I don’t know how anyone makes full size blankets of afghans in worsted weight or smaller yarn.  They always look amazing, but they must take ages to complete.

Straw Bale Garden Part 2: Planting

Last night I was up for a while with the baby and I had a brilliant (note sarcasm) idea.  Why don’t I plant the tomatoes and protect the ones closest to the house with tomato cages?  I have no idea when the work on the house will be finished, and I needed to get the plants in, so I went for it.

IMG_8171.JPG

I like to plant a variety of colors, sizes, and shapes.  It’s fun and the kids love it.

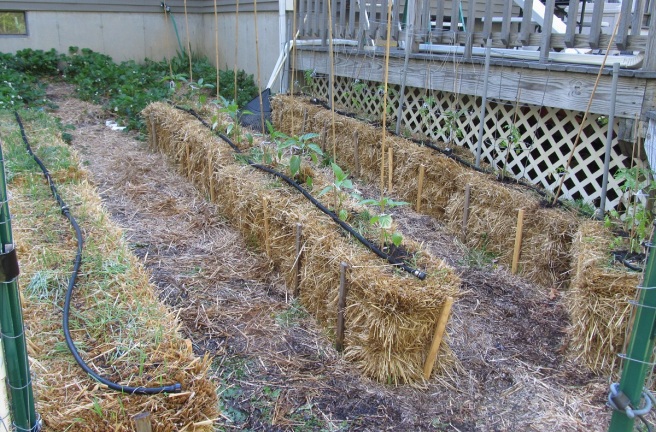
The row on the left has four bales each with a different variety of cucumber: Miniature White (miniature and white), Lemon (round and yellow), Muncher (green slicing), and Early Fortune (green slicing).  The Lemon cucumbers are a repeat from last year when they kind of took over the garden and produced like crazy.

The center row has eight pepper plants, two per bale.  Six are assorted bell peppers from a seed mix.  Two are cubanelle (aka banana) peppers.  I also have three mini/small pepper varieties (Tangerine, Savour, and Jimmy Nardello) which I will plant in pots on the deck as soon as I get some potting soil.  We have grown the rainbow bells and the cubanelles in the past and had luck with both.

The row closest to the deck has the tomatoes.  I planted ten plants in seven cherryish varieties: one super sweet 100 (red), two sungold (orange), one gold rush currant (tiny and orange), two sunrise bumblebee (yellow with red stripes), two black cherry (brownish greenish reddish), one indigo blueberry (black/rose), and one white cherry (pale yellow).  Sadly, our green envy seedlings didn’t do well.  One of the black cherries I planted is pretty small.  If it doesn’t so well I’ll replace it with a currant or white cherry or something.  I have a few extras.  The super sweet 100, sungold, and black cherry are repeats.  The green envy would have been if they had survived.  The others are new ones to try this year.  Last year we also grew yellow pear and indigo rose, but neither had great flavor.

Now I just need to water, fertilize, watch them grow, and wish I liked tomatoes.

Here’s some of our harvest from last year, which my sister got to take home with her.  At peak we were picking almost twice that many tomatoes every day.

Straw Bale Garden Part 1.5: Waiting

I need to do a garden update.  I should have done a post about planting by now.  I should have planted by now.  The bales are ready.  The plants are ready.  But, we are having some work done on the house.

5-16-16 (1)

As much as I want to plant, I’m hesitant to put my plants right under where contractors are working.  Unfortunately, I’ll have to risk it soon because the work, which was supposed to be done this week, is running about a month behind.  They haven’t even started on the roof yet.

The “grass” on the bales is wheat.  Even straw has seeds in it, and they sprout.  It’s a good sign that the bales are ready.  I usually pull it out by the handful and lay it down on top of the bale.  It can compost over the summer.

Here are the plants.  The peppers are doing really well.  I lost a couple tomato seedlings to surprise weather while I was hardening them off.

5-16-16 (2)

At least our berries are doing well.  Over the past 2 years we have planted 18 highbush blueberries, 15 blackberries, 12 black raspberries, 9 red raspberries, and 1 yellow raspberry.  I think.  I might have miscounted.  And, of course, our strawberries (some shown below.)  I like berries.  A lot.  We’re also using the thorny ones as a hedge along the woods to hopefully eventually discourage the local deer from walking through our property.  Even if that doesn’t work, we’ll enjoy eating them.  Little A (2) keeps checking all the raspberry canes.  He’s can’t wait for them to fruit.

5-16-16 (4)

Summer is for Blankets

I forgot how difficult it is to work on critters during the summer.  I’m outside with the kids all the time and I can’t juggle yarn, hook, scissors, stuffing fluff, eyes, paper, and pencil (to record the pattern,) not to mention the baby.  Inside I spread out all over a table.  I can’t do that outside in the breeze.  It’s hard to get any crocheting done, but I manage to occasionally make progress on simple projects, like blankets.

Thankfully, I have a blanket to work on.  I have the octagon pattern memorized now and just have to finish edging the last octagon and make the triangles for the sides and sew it together.  Not bad.

And I totally, desperately, want to make this for Miss C’s room.

The square is a free pattern on Ravelry

http://www.ravelry.com/patterns/library/victorian-lattice-square

I just love how when the squares are sewn together they make diamond pattern.  Here’s a large version of the picture.  So pretty.

I’ll have to try to clear my project backlog first.  I really need to get the baby blankie and dragon done, at the very least.

Masking Tape Alphabet Canvas

IMG_7646 (2)

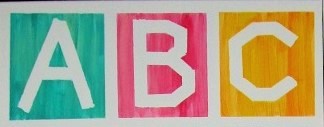
The kids have been doing some making tape paintings.  You know, where you put masking tape on the canvas, paint over it, let it dry, and then peel off the tape.  The method is fun, but the results have been, well, lackluster.IMG_7647Then I found some large (18″ x 24″) canvases on sale for $3 each.  I decided, on the spot, that I would make a giant masking tape alphabet for Miss C’s room.
Materials:

  1. canvases
  2. Masking tape or painters tape.  I ran out of my partial green roll, so I had to get more.
  3. paint
  4. brushes
  5. something to keep paint off the cheap playroom carpet

Steps:

  1. Put masking tape on the canvas in the shapes you want
  2. press down firmly all over the tape
  3. paint
  4. let dry
  5. peel off the tape

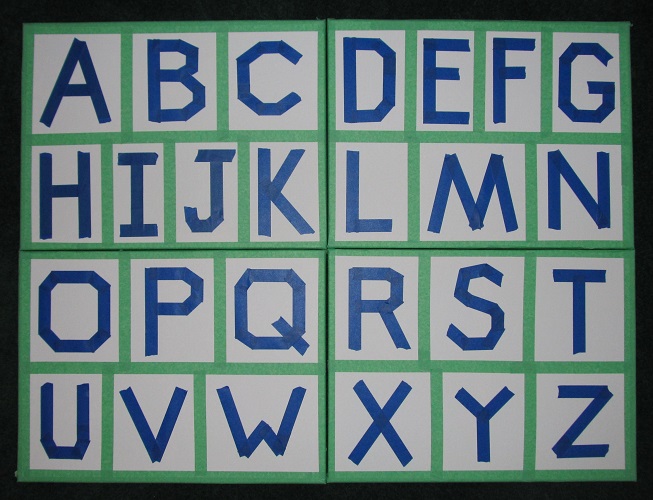
Here is my alphabet all taped.  I used 1″ tape.  The whole thing is 4 feet wide by 3 feet tall.

IMG_7622

A close up of some letters.  I didn’t try to make them perfect.  I like the rough edges.

IMG_7624

all painted and drying.

Miss C’s room is a light, cool purple.  I chose pink, yellow, teal, blue, and purple for the letters.  For each color I swirled two paints so there would be a little color variation.  The purple is dark purple and white.  The pink is light and dark pink.  The blue is light and dark blue.  The yellow is yellow and orange.  The teal is teal and very light yellow.

IMG_7634

All finished (well, almost)

IMG_7646

Like I said, it’s 3 feet by 4 feet.  It’s huge.  I love how the colors turned out and I think it will look really nice in her room.  I’m going to get some mending plates and screw the wooden frames of the canvases together to make it effectively one enormous canvas.  I’ll take another picture once I eventually get it on the wall.


Octagon Blankie Progress

IMG_7598

I love how the blankie is coming along!  I have the other five spirals done, I just have to edge them in navy.  And make three more squares.  And make some half squares for the sides and maybe some quarter squares for the corners of the blankie.  And then sew everything together and edge it, of course.

The hardest part is staying focused until it’s done.

The border of the white spiral apparently got tucked under during the photo.  Oops.  It’s really the same shape as the others.